

Thinking about a quick and easy way to refresh your walls? Vinyl wall art stickers are a practical solution for adding personality and style without the commitment or mess of paint or wallpaper. They are versatile, removable, and come in a huge range of designs, making them ideal for renters, busy homeowners, or anyone looking for a change.
Let’s break down what these popular decorative elements are made of and how they function. Understanding the basics will help you choose the right ones for your project and ensure a smooth application.
The Material Behind the Magic
At their core, vinyl wall art stickers are made from a thin, self-adhesive vinyl film. This film is highly durable yet flexible, allowing it to adhere smoothly to various surfaces. It’s the same type of material you often see used for vehicle wraps or outdoor signage, but formulated for interior use. The adhesive is typically pressure-sensitive, meaning it sticks firmly once applied, but can also be removed without leaving residue or damaging the underlying surface – a crucial feature for renters or those who like to redecorate frequently.
How They’re Made
The designs you see are typically cut out of these large sheets of vinyl using a specialized plotter. This allows for intricate patterns, lettering, and even custom designs to be precisely formed. Once cut, the “waste” vinyl is removed, leaving just the desired design on a backing paper. A transfer tape is then applied over the top, which holds the design together during application and helps you peel it off the backing and place it on your wall cleanly.
Beyond the Basic Silhouette
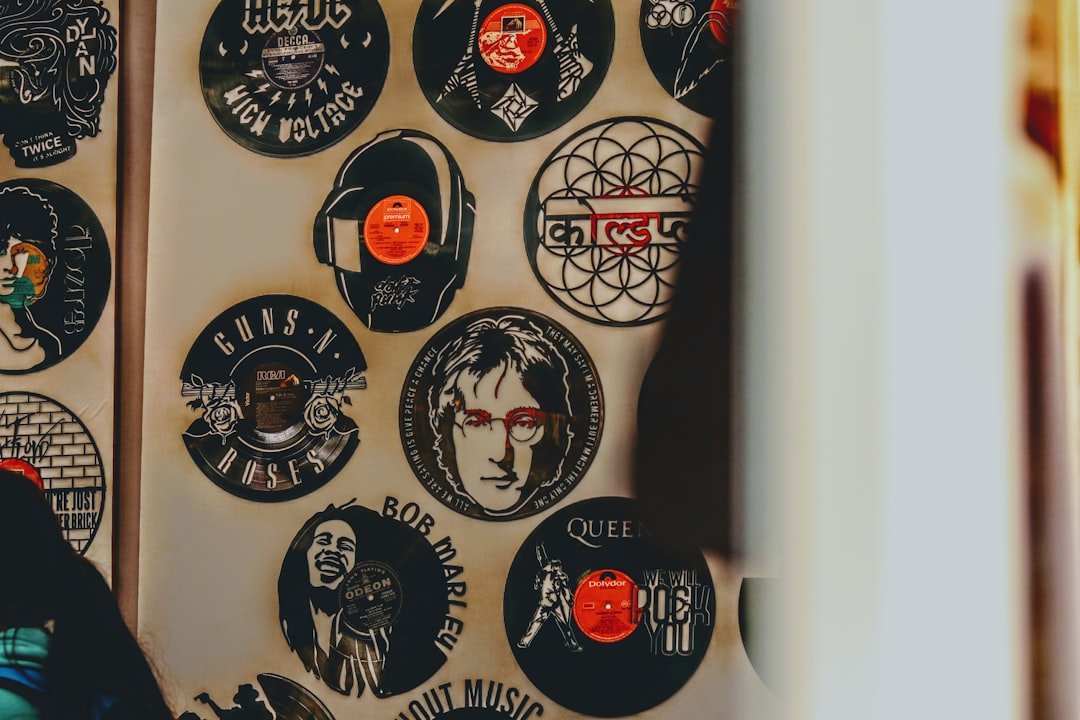
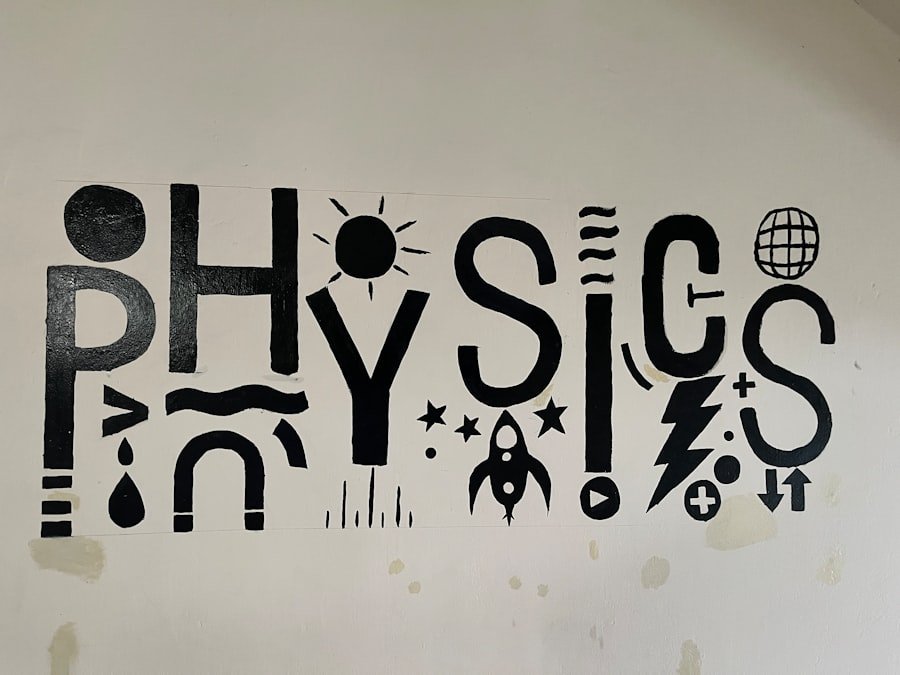
While many people think of simple silhouette designs when they hear “vinyl wall art,” the technology has advanced significantly. You can now find stickers that mimic painted murals, intricate mandalas, large-scale maps, and even photo-realistic images. Some vinyl is even designed to have a matte finish, giving a more painted-on look, while others might have a slight sheen or even a textured appearance. The variety means you’re likely to find something that suits your aesthetic, whether you prefer minimalist designs, bold statements, or subtle accents.
If you’re looking to enhance your home decor with unique designs, you might find inspiration in the article about creative uses for vinyl wall art stickers. This resource explores various ways to incorporate these versatile stickers into your living space, from accent walls to personalized touches in children’s rooms. To learn more about how to transform your home with these stylish decals, check out the article here: Creative Uses for Vinyl Wall Art Stickers.
Why Consider Vinyl Wall Art?
There are several compelling reasons why vinyl wall art stickers have become such a popular choice for home decorators. Beyond just aesthetics, they offer practical advantages that traditional decorating methods often lack.
Ease of Application
One of the biggest draws of vinyl wall art is how straightforward it is to apply. Unlike painting, which requires prep work, multiple coats, and a drying period, or wallpapering, which can be notoriously finicky, vinyl stickers go up quickly. Most designs come with clear instructions, and basic tools like a squeegee (often included) are all you need. This makes them an excellent option for DIY enthusiasts and those who want an immediate visual impact without a major project. You don’t need any specialized skills or professional help, saving both time and money.
Budget-Friendly Decor
Compared to custom artwork, framed prints, or hiring a painter for a mural, vinyl wall art is significantly more affordable. You can achieve a high-impact look for a fraction of the cost. This allows you to update your decor more frequently or experiment with bolder designs without a substantial financial commitment. If you’re decorating on a tight budget, these stickers offer a lot of bang for your buck. Pricing varies depending on size and complexity, but generally, it’s an accessible way to personalize your living space.
Flexibility and Low Commitment
Life changes, and so do decorating preferences. Vinyl wall art is ideal for those who prefer flexibility. They are designed to be temporary. If you get tired of a design, want to try something new, or are moving to a new place, most vinyl stickers can be removed without damaging your walls or leaving any sticky residue. This is particularly valuable for renters who can’t paint or make permanent alterations. It means you can express your style freely without worrying about long-term consequences.
Versatility in Design and Placement
The sheer variety of designs available is astounding. From inspirational quotes and geometric patterns to nature scenes, cartoon characters for kids’ rooms, or abstract art, there’s a sticker for virtually every taste and every room. Beyond walls, they can be applied to other smooth surfaces like doors, furniture, windows, mirrors, or even appliances, adding a unique touch to unexpected places. This versatility allows for creative expression and cohesive design throughout your home, or isolated statements in specific areas.
Minimal Maintenance
Once applied, vinyl wall art requires very little upkeep. Unlike framed art that might accumulate dust on its frame and glass, or fabrics that need cleaning, vinyl surfaces can generally be wiped clean with a damp cloth if they get dusty. They don’t fade quickly in typical indoor conditions and are durable enough to withstand everyday wear and tear. This low-maintenance aspect adds to their practical appeal, freeing up your time for other things.
Choosing the Right Wall Art Sticker for Your Space
With countless options available, making a selection can feel overwhelming. Tailoring your choice to your room’s function, existing decor, and personal style is key to a successful outcome.
Consider Your Space’s Purpose
Think about the room you’re decorating. A serene, abstract design might be perfect for a bedroom, promoting relaxation. A playful, colorful sticker could be excellent for a child’s room or a playroom. For a home office, an inspirational quote or a map could serve as motivation or a conversational piece. In a living room, a larger, more impactful design might draw attention and anchor the space, while a subtle pattern could enhance a hallway. The sticker should complement the room’s primary function and mood.
Size Matters: Scale and Placement
Before ordering, measure your wall space. A sticker that’s too small for a large wall can look lost, while one that’s too big can overwhelm a small area. Consider the scale of the design relative to your wall and any furniture below it. Will it be a focal point, or a subtle accent? Use painter’s tape or cut paper templates to help visualize the size and placement on your wall before committing. Think about what will be around the sticker – shelves, other artwork, windows – and ensure it all works together.
Design and Style Match
Your vinyl wall art should ideally complement your existing decor. If your home has a minimalist aesthetic, a simple geometric design or a tasteful quote might fit best. For a bohemian look, consider organic patterns or nature-inspired motifs. A more traditional space might benefit from intricate floral designs or classic typography. Browse different styles thoroughly. Don’t be afraid to mix and match if you have an eclectic style, but ensure there’s a unifying element, like a color palette or a thematic thread.
Color Coordination
Color plays a significant role in how a sticker will integrate into your room. If your walls are a neutral color, you have more freedom to introduce a vibrant sticker. If your walls are already colored or patterned, choosing a sticker in a complementary or contrasting hue can create visual interest. Consider the colors of your furniture, textiles, and other decor items. Many vinyl stickers come in a wide array of color options, allowing you to fine-tune your choice. A monochromatic look can be sophisticated, while a bold contrast can add energy.
Surface Suitability
While vinyl stickers adhere to most smooth, clean surfaces, there are exceptions. Newly painted walls should be left to cure for at least two to three weeks before application to ensure the paint fully hardens. Highly textured walls (like stucco or heavily patterned wallpaper) are generally not suitable, as the vinyl needs a smooth surface to adhere properly and prevent air bubbles. Porous surfaces like unpainted wood might also be problematic. Read the product description carefully regarding recommended surfaces, and if in doubt, consider ordering a small test decal first.
Application Tips for a Smooth Finish
Applying vinyl wall art stickers is generally straightforward, but a little preparation and careful execution can make a big difference in the final look and longevity.
Surface Preparation is Key
This is arguably the most crucial step. Your wall or chosen surface needs to be clean, dry, and smooth. Dust, dirt, or grease will interfere with the adhesive. Wipe down the area with a damp cloth and allow it to dry completely. For walls, ensure there’s no flaking paint or residue from previous decorations. If you’ve just painted, wait the recommended two to three weeks for the paint to fully cure. A clean foundation ensures a strong, lasting bond and prevents bubbles or peeling.
Gather Your Tools
You won’t need much, but having the right items on hand will streamline the process. You’ll definitely want a squeegee (often included with the sticker). A credit card or similar rigid, flat object can work in a pinch. Also, have painter’s tape for positioning, a measuring tape or ruler, a pencil (lightly used), and a soft cloth ready. For larger designs, a second pair of hands can be very helpful.
The Application Process: Step-by-Step
Most large stickers follow a standard process:
- Lay Flat: Unroll your sticker and lay it flat on a clean surface for a few hours, or even overnight, to help it relax and flatten out, especially if it arrived rolled up.
- Rub Firmly: Using your squeegee, rub firmly across the entire front of the transfer tape. This ensures the vinyl adheres well to the transfer tape, making it easier to peel off the backing.
- Position with Tape: Hold the sticker against your wall and use painter’s tape to secure it in place. Step back and check the positioning and levelness. Adjust until you’re happy with it. For larger designs, create a “hinge” by running a single strip of tape vertically or horizontally down the center.
- Slow and Steady Peel: Starting from one side of your hinge (or one corner if no hinge), slowly peel the backing paper away from the transfer tape and vinyl. Fold the backing paper back on itself. As you do this, firmly press the vinyl (still attached to the transfer tape) onto the wall using your squeegee, working from the center outwards to push out air bubbles.
- Remove Transfer Tape: Once the entire design is adhered to the wall, rub over it firmly one last time with your squeegee. Then, starting from a corner, slowly and carefully peel back the transfer tape at a sharp angle. If any part of the sticker tries to lift with the tape, simply press it back down and rub again before continuing to peel.
- Final Touches: After the transfer tape is removed, you can gently rub over the design with a soft cloth to ensure it’s fully adhered. If you see any small air bubbles, you can often push them out to the edge with your finger or the squeegee. For stubborn tiny bubbles, a pinprick might help, but do this sparingly.
Troubleshooting Common Issues
- Bubbles: Small bubbles can often be smoothed out to the edge with a squeegee. Larger, trapped bubbles can sometimes be gently pricked with a fine needle to release the air, then smoothed down.
- Lifting Edges: If edges aren’t sticking, ensure the surface is clean and dry. You can try gently pressing them down firmly again. In rare cases, a tiny dab of craft glue might help, but this compromises removability.
- Sticker Tearing: If the sticker tears during application, it’s often because you pulled the transfer tape too quickly or at the wrong angle. Take your time, pull slowly, and keep the tape as flat as possible against the wall.
Vinyl wall art stickers are a fantastic way to personalize any space, and if you’re looking for creative ideas to enhance your environment, you might find inspiration in a related article about 3D wall decor. This piece explores how three-dimensional designs can transform a school setting, making it more engaging for students and staff alike. To learn more about these innovative decorating options, check out the article here.
Maintenance and Removal
| Product Name | Size | Material | Color Options | Price |
|---|---|---|---|---|
| Flower Vine Wall Decal | 24″x36″ | Vinyl | 3 | 15.99 |
| Family Quote Wall Sticker | 12″x24″ | Vinyl | 1 | 12.99 |
| Butterfly Wall Art Decal | 18″x18″ | Vinyl | 5 | 9.99 |
One of the key advantages of vinyl wall art is its low maintenance and, when needed, easy removal. Knowing how to care for them and take them down correctly will preserve your walls.
Keeping Your Stickers Looking Fresh
Vinyl wall art is surprisingly durable, but a bit of gentle care will ensure they last.
- Dusting: Like any surface, they can accumulate dust. A soft, dry cloth or a feather duster is usually sufficient for regular dusting.
- Cleaning: If they get smudged or dirty, wipe them gently with a slightly damp cloth. Avoid harsh chemical cleaners, abrasive scrubbers, or excessive rubbing, as this can damage the vinyl or fade the colors over time. Mild soap and water are generally safe for tougher spots, but always test on an inconspicuous area first.
- Avoid Heat Sources: While durable, extreme direct heat sources (like right above an unvented stove or a very hot lamp) can potentially cause the vinyl to warp or the adhesive to weaken over a long period. This is rarely an issue in typical room conditions, but good to be aware of.
- Sunlight Exposure: Over many years, prolonged direct sunlight on certain vinyl types can lead to some fading, particularly with very vibrant colors. If your sticker is in a spot with intense sun exposure, consider this aspect, though most indoor vinyls are designed to be quite resistant.
The Removal Process
Removing vinyl wall art is typically a straightforward, mess-free process, especially if you followed application guidelines and the sticker is a high-quality “removable” type.
- Start at a Corner: Locate an edge or a corner of the sticker. If it’s a large design, you might want to start at one of the top corners.
- Gentle Heat (Optional, but Recommended): While not always necessary, gently warming the vinyl with a hairdryer set on a low heat setting can make removal easier. The heat softens the adhesive, allowing the sticker to peel away more smoothly. Hold the hairdryer a few inches away from the sticker and warm a small section at a time. Do not overheat the wall or concentrate heat in one spot for too long.
- Peel Slowly, at a Sharp Angle: Once you have a corner lifted, slowly and steadily peel the sticker away from the wall. Try to pull it at a sharp angle – almost flat back against itself – rather than pulling it straight out. This helps release the adhesive gradually and prevents it from tearing or pulling off paint.
- Take Your Time: Patience is key. If you pull too quickly, parts of the sticker might tear or, rarely, it could pull off paint if the paint was old, poorly applied, or the wall surface wasn’t properly prepared to begin with.
- No Residue: High-quality removable vinyl stickers are designed to leave little to no adhesive residue. If you do find a sticky spot, a mild adhesive remover (like rubbing alcohol on a soft cloth) can usually clean it up without damaging most wall paints, but always test in an inconspicuous area first. Avoid harsh chemicals.
- Disposal: Once removed, simply discard the vinyl. Most wall art stickers are not designed for reapplication, as the adhesive’s strength diminishes after removal and the vinyl can stretch or distort.
By understanding these practical aspects of vinyl wall art stickers, you can confidently choose, apply, and maintain them to enhance your living spaces in a simple yet effective way.