

Thinking about sprucing up your walls without a huge commitment or budget? Wall stickers, sometimes called wall decals, are a straightforward way to do just that. They’re basically adhesive-backed designs, letters, or images that you apply directly to a wall. You can find them in all sorts of styles, from simple graphics to intricate patterns, and they’re generally pretty easy to put up and take down, which makes them a flexible option for anyone wanting to refresh their decor without a permanent change.
Wall stickers offer a unique blend of practicality and aesthetic appeal that makes them a compelling option for many spaces. They’re not just for kids’ rooms anymore; their versatility extends to every corner of a home and even into commercial settings.
Budget-Friendly Decorating
One of the biggest draws of wall stickers is their cost-effectiveness. Compared to traditional wallpaper, painting, or hiring a mural artist, stickers are significantly cheaper. This allows you to experiment with different looks without a major financial outlay. If your style changes, or if you move, you’re not out a lot of money. It’s an accessible way to introduce substantial visual interest.
Ease of Application
Applying wall stickers is generally a simple process that doesn’t require specialized skills or tools. Most come with clear instructions, and the general method involves carefully peeling the backing and smoothing the sticker onto the wall. Many larger designs come in sections, making them manageable. This DIY-friendly nature means you can transform a room in an afternoon without needing to call in professionals.
No Permanent Commitment
Unlike paint or wallpaper, wall stickers are designed to be temporary. Most are removable, and many are even repositionable, meaning you can adjust them during application or take them down completely without damaging the wall surface underneath. This is ideal for renters, those who frequently redecorate, or anyone who likes to keep their options open.
Variety and Versatility
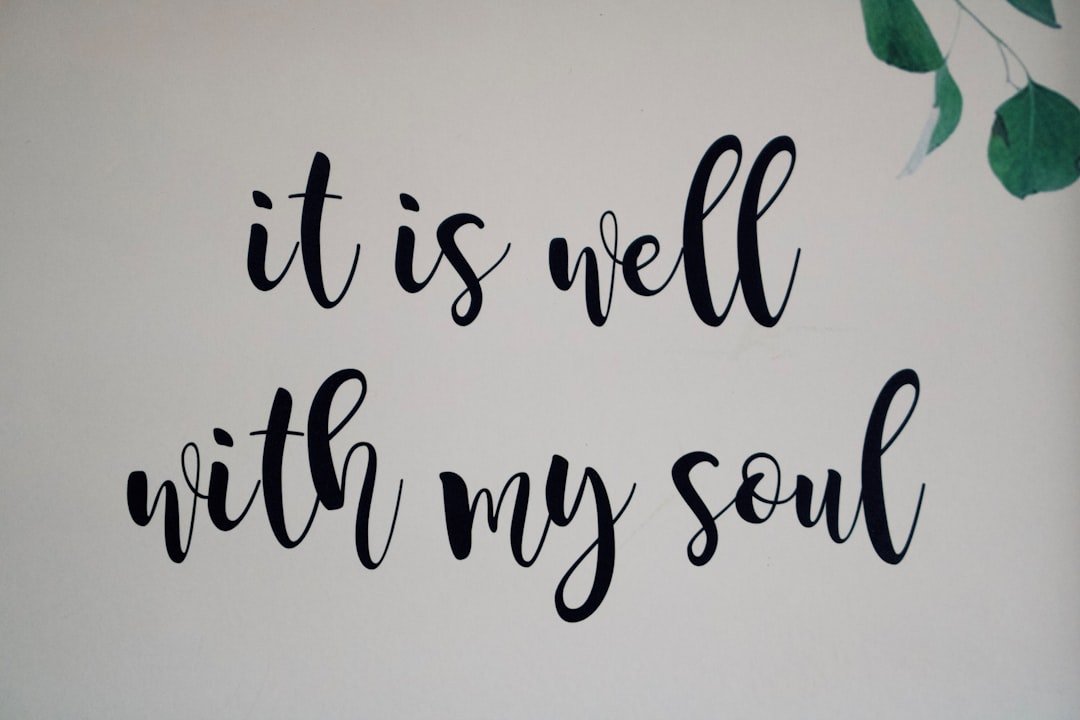
The sheer range of designs available is another significant advantage. From minimalist geometric shapes to detailed natural scenes, quotes, and even custom designs, there’s a sticker for almost every taste and interior style. They can be used in any room, on any smooth surface, and can complement existing furniture and decor. This versatility makes them adaptable to evolving trends or personal preferences.
Surface Protection Option
In some cases, specific types of wall stickers can offer a subtle layer of protection for walls. For instance, clear protective films can shield high-traffic areas from scuffs, or decorative stickers can cover minor imperfections on a wall without needing a full repaint. While this isn’t their primary purpose, it’s a fringe benefit worth noting for certain applications.
If you’re looking to enhance your living space with unique and creative designs, you might find inspiration in this article about wall stickers decor. It explores various themes and styles that can transform any room into a personalized haven. For more ideas and options, check out the wishlist at Wallstickr, where you can discover a wide range of wall stickers that suit your taste and elevate your home decor.
Choosing the Right Wall Stickers for Your Space
Navigating the vast selection of wall stickers can feel a bit overwhelming, but focusing on a few key aspects can help you zero in on the perfect choice for your room. It’s not just about what looks good, but also what will work well with your environment and your intentions.
Consider Your Space and Existing Decor
Before diving into designs, take a good look at the room you’re decorating.
- Room Function: Is it a calm bedroom, a vibrant living area, or a high-energy kids’ play zone? The function of the room often dictates the most appropriate style and color palette for your stickers.
- Existing Color Scheme and Furnishings: Your stickers should complement, not clash with, your current paint colors, furniture, and other decor elements. Think about whether you want them to blend in subtly or stand out as a focal point.
- Wall Condition: Are your walls smooth, or do they have a texture? Most wall stickers adhere best to smooth, clean, and dry surfaces. Textured walls might not allow for proper adhesion, leading to peeling.
Material Matters
Wall stickers are typically made from vinyl, but there are variations.
- Standard Vinyl: This is the most common type. It’s durable, waterproof, and comes in various finishes (matte, glossy). Matte finishes often look more integrated with the wall, resembling paint.
- Fabric Decals: These are a newer option, offering a softer, more textile-like feel. They are often more expensive but are highly durable, tear-resistant, and usually repositionable multiple times without losing adhesion. They also tend to be eco-friendlier, as some are made from recycled materials.
- Eco-Friendly Options: Look for stickers made with non-toxic, water-based adhesives and materials free of harmful VOCs, especially for children’s rooms or chemically sensitive individuals.
Size and Scale
The size of your sticker should be proportional to the wall and the room.
- Focal Point: If you want the sticker to be a dominant feature, choose a larger, more intricate design.
- Accent Piece: For a subtle touch or to complement other decor, opt for smaller decals or a collection of smaller, themed stickers.
- Wall Dimensions: Measure your wall before ordering. Visualizing how a sticker will fit can prevent disappointment. Most online retailers provide dimensions, and some even offer mock-ups.
Design and Style
This is where personal preference comes in, but keep the overall aesthetic in mind.
- Themes: Nature, geometric, abstract, motivational quotes, cityscapes – the options are endless. Choose a theme that resonates with you and the room’s purpose.
- Color Palette: Decide if you want a bold, contrasting color, or something more muted that harmonizes with your existing decor. Monochromatic stickers can add texture without overwhelming.
- Level of Detail: Some designs are highly intricate, while others are very simplistic. Consider how much visual ‘noise’ you want to introduce into the space.
Removability and Reusability
Always check the product description for these features.
- Removable: Most quality wall stickers are designed to be removed without damaging paint or leaving residue. This is crucial for renters or those who like to change things up.
- Reusable/Repositionable: Some premium fabric decals can be peeled off and reapplied multiple times. This is excellent for practice during application or for changing the layout periodically. If you know you’ll want to move it, prioritize this feature.
Practical Steps for Application

Applying wall stickers isn’t rocket science, but a little preparation and care can make a big difference in the final look and how well the sticker adheres. Patience is key.
Preparing Your Wall
A clean, smooth surface is paramount for good adhesion.
- Clean the Surface: Wipe down the wall with a damp cloth to remove any dust, dirt, or grease. For painted walls, a mild soap solution followed by a clean water rinse works well.
- Dry Thoroughly: Ensure the wall is completely dry before application. Trapped moisture can prevent the adhesive from sticking properly. Allow at least 24 hours after cleaning, or even longer if the wall was recently painted (typically wait 2-3 weeks after painting for optimal adhesion).
- Smooth Out Imperfections: While stickers can hide very minor flaws, large bumps, cracks, or peeling paint will likely show through and can compromise adhesion. Address these issues beforehand.
Tools You’ll Need
You won’t need an extensive toolkit.
- Squeegee or Credit Card: Essential for smoothing out air bubbles and ensuring good contact.
- Measuring Tape and Pencil: For precise placement, especially with larger or multi-part designs.
- Painter’s Tape: To temporarily hold the sticker in place during planning and while applying.
- Scissors or Craft Knife: To trim excess backing paper or separate parts of a multi-piece design.
- Lint-Free Cloth: For final buffing.
The Application Process
This general guide applies to most vinyl and fabric decals. Always refer to the specific instructions provided with your sticker, as there can be variations.
- Plan Your Placement: Hold the sticker (or segments of it) up against the wall using painter’s tape. Step back and view it from different angles. Use a pencil to mark indicator points on the wall. For multi-part designs, lay them out on the floor first to visualize the complete image.
- Clean and Flatten (if necessary): If your sticker arrived rolled, unroll it and lay it flat for a few hours, or even overnight, with some weight on top to flatten it out. This helps prevent curling during application.
- Peel Back Carefully: For many decals, you’ll slowly peel the backing paper away from the transfer tape (the clear or translucent top layer containing the design). The design should stick to the transfer tape. For smaller, simpler stickers, you might just peel the design directly off its backing.
- Apply to Wall: Starting from one edge, slowly press the design onto the wall using your squeegee or credit card. Work from the center outwards, or from top to bottom, to smooth out any air bubbles as you go. Apply firm, even pressure.
- Remove Transfer Tape (if applicable): Once the entire design is adhered to the wall, wait a few minutes (check instructions for recommended time). Then, slowly and carefully peel back the transfer tape at a sharp angle. If any part of the design lifts, press it back down with your squeegee and re-attempt peeling.
- Final Smoothing: Once the transfer tape is completely removed, use your squeegee or a soft cloth to gently smooth over the entire design, ensuring all edges are firmly adhered.
Troubleshooting Common Issues
- Air Bubbles: If you spot small bubbles after application, you can often push them to the edge with your squeegee. For stubborn ones, a tiny pinprick can release the air, then smooth it down.
- Lifting Edges: If edges start to lift, gently press them back down firmly with your fingers or squeegee. Sometimes, applying some heat with a hairdryer on a low setting for a few seconds can help reactivate the adhesive, then press firmly.
Creative Ways to Incorporate Wall Stickers
Beyond just sticking a design on a blank wall, there are numerous imaginative ways to use wall stickers to enhance your home’s aesthetic and functionality. Think outside the standard-issue decal.
Creating a Feature Wall
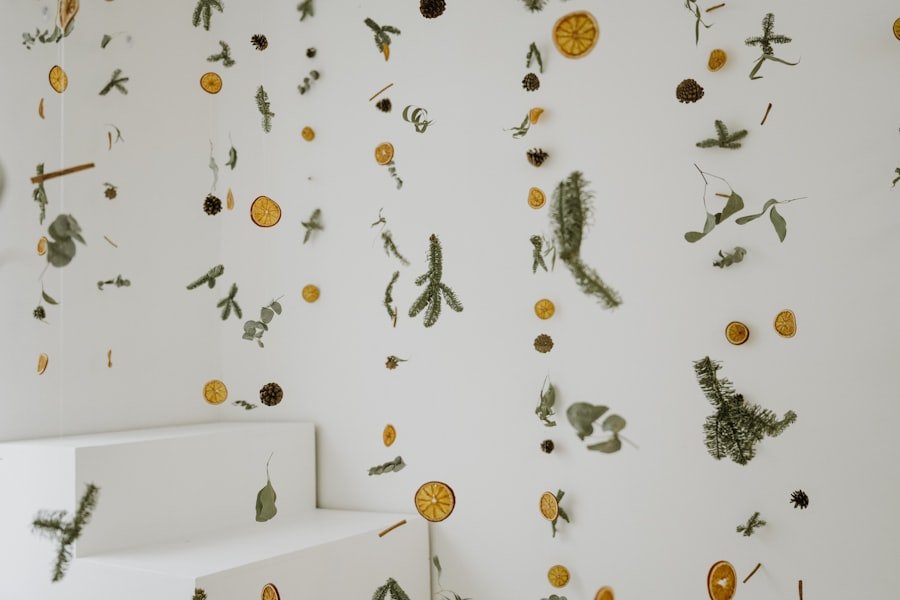
Instead of wallpaper or paint, use a large, striking wall sticker or a collection of coordinated decals to create a focal point in a room. This could be an intricate floral pattern behind a bed, a cityscape outline in a living room, or a bold geometric design in a dining area. The advantage is you get the impact of a feature wall without the permanence or extensive effort of other methods.
- Large-Scale Graphics: A massive tree, a panoramic landscape, or an abstract art piece can define a room.
- Repeating Patterns: Use multiple smaller decals to create your own repeating pattern, mimicking wallpaper but with more control and less commitment.
Personalizing Furniture and Objects
Wall stickers aren’t just for walls. They can breathe new life into furniture, appliances, or even doors.
- Dress Up a Dresser: Add a stripe of pattern to the front of drawers, or a whimsical design to a plain wardrobe.
- Revamp Appliances: Give an old fridge a modern look with a geometric design or a pop of color.
- Door Decals: Transform a plain interior door into a design element with a full-cover graphic or a clever trompe l’oeil effect.
- Laptop or Device Skins: While not strictly “wall” stickers, larger decals can be cut down to personalize electronics, offering a consistent design theme throughout your space.
Educational and Functional Displays
In kids’ rooms or home offices, stickers can be both decorative and practical.
- Growth Charts: A popular choice for children’s rooms, these wall stickers allow you to track your child’s height against fun designs like trees or rulers.
- Maps and Globes: Educational world maps or celestial charts can be engaging decor in a child’s bedroom or a study.
- Calendar or Whiteboard Stickers: Adhesive vinyl that functions as a dry-erase board can be incredibly useful in a kitchen for meal planning or in an office for notes, all without drilling.
- Quote and Text Decals: Inspirational quotes, family mottos, or definitions can add personality and thought-provoking elements to any room.
Zoning and Defining Spaces
In open-plan living areas or studios, stickers can subtly divide zones without physical barriers.
- Visual Dividers: A distinct pattern on the wall of a dining nook can subtly separate it from the living room area without blocking light or sightlines.
- Activity Zones: Use playful, themed stickers to define a play area in a child’s bedroom or a creative corner in a shared space.
- Headboards: Create the illusion of a headboard behind a bed with a detailed decal, perfect for small spaces or minimalist designs.
Seasonal and Temporary Decor
Because of their removability, wall stickers are excellent for seasonal changes or temporary celebrations.
- Holiday Themes: Quickly decorate for Christmas, Halloween, or other holidays without permanent fuss. Think snowflakes, spooky silhouettes, or festive greetings.
- Event Decor: For parties or special events, use temporary stickers to set a theme, then easily remove them afterward without damage.
- Trend Exploration: If you’re keen on a current design trend but aren’t sure it will last, a wall sticker is a low-risk way to try it out.
If you’re looking to enhance your living space with unique designs, wall stickers can be a fantastic option. They offer a versatile way to express your personality and style without the commitment of paint or wallpaper. For more inspiration on how to creatively use wall stickers in your home decor, check out this insightful article on wall sticker ideas. Whether you prefer bold graphics or subtle patterns, there’s something to suit every taste and room in your house.
Maintaining and Removing Your Wall Stickers
| Category | Metrics |
|---|---|
| Popularity | High demand in home decor |
| Variety | Available in various designs and sizes |
| Material | Usually made of vinyl or PVC |
| Application | Easy to apply and remove |
| Usage | Used for adding aesthetic appeal to walls |
Once your wall stickers are up and looking great, a little care will ensure they last. And when it’s time for a change, removing them is usually straightforward, provided you follow a few simple steps.
Cleaning Your Decals
Wall stickers are generally low-maintenance, but they can accumulate dust just like any other surface.
- Gentle Dusting: For light dust, a soft, dry microfiber cloth is usually sufficient.
- Spot Cleaning: For smudges or dirt, dampen a soft cloth with plain water. You can add a very mild soap (like a diluted dish soap) if needed, but test it on an inconspicuous area first to ensure it doesn’t affect the decal’s color or finish. Avoid abrasive cleaners or harsh chemicals, as these can damage the vinyl or adhesive.
- Avoid Excessive Scrubbing: Vigorously scrubbing can lift edges or even scratch the surface of the decal. Gentleness is key.
Longevity Factors
How long your wall sticker lasts depends on a few things:
- Surface Preparation: As discussed, a clean, smooth, dry wall helps the adhesive bond properly.
- Environment: High humidity, direct sunlight, or extreme temperature fluctuations can reduce the lifespan of some decals. Excessive heat can sometimes weaken the adhesive or cause the vinyl to warp.
- Quality of Sticker: Higher quality vinyl and adhesive generally lead to greater durability and a longer lifespan. Expect well-applied, good quality stickers to last several years under normal indoor conditions.
- Traffic: In high-traffic areas where walls might be frequently touched or brushed against, edge lifting might occur sooner.
Removing Your Wall Stickers
The good news is most modern wall stickers are designed to be removed cleanly without damaging the paint underneath.
- Start at an Edge: Gently pick at one corner or edge of the sticker until you can get a good grip. A fingernail or a plastic scraper (like a credit card) can help here, but be careful not to scratch the wall.
- Peel Slowly and Evenly: The key is to peel the sticker back very slowly and at a sharp angle (close to 180 degrees) against the wall. Think of pulling it almost back on itself. Avoid pulling straight outwards, as this increases the likelihood of paint lifting.
- Apply Gentle Heat (if needed): If the sticker is stubborn or the adhesive is old, you can use a hairdryer on a low-medium setting to warm the decal slightly. Hold the hairdryer a few inches away and move it around for about 10-20 seconds. The warmth softens the adhesive, making it easier to peel. Proceed slowly with the peeling.
- Deal with Residue (Rare): Most quality decals won’t leave residue. If a small amount is left behind, a soft cloth with a tiny bit of rubbing alcohol or a citrus-based adhesive remover can often clean it up. Test these products in an inconspicuous area first. Avoid aggressive scrubbing or harsh chemicals.
- Inspect the Wall: After removal, check your wall. With proper technique and a good quality sticker on well-prepared paint, your wall should be intact and ready for its next transformation.
Wall stickers offer a straightforward, accessible, and versatile way to express your style and refresh your living spaces. With a bit of thought in selection and care in application, they can be a satisfying and practical decor choice.